Acer B276HUL User Manual Page 21
- Page / 28
- Table of contents
- TROUBLESHOOTING
- BOOKMARKS
- Acer LCD Monitor 1
- Special notes on LCD monitors 3
- Accessibility 4
- Safe listening 4
- Warnings 4
- Using electrical power 4
- Product servicing 5
- Additional safety information 6
- Disposal instructions 7
- LCD pixel statement 7
- Finding your comfort zone 8
- Taking care of your vision 9
- Developing good work habits 9
- Declaration of Conformity 10
- Unpacking 13
- ATTACHING/REMOVING THE BASE 14
- SCREEN POSITION ADJUSTMENT 15
- Connecting the power cord 17
- Power saving 17
- Display Data Channel (DDC) 17
- Connector pin assignment 18
- Standard timing table 20
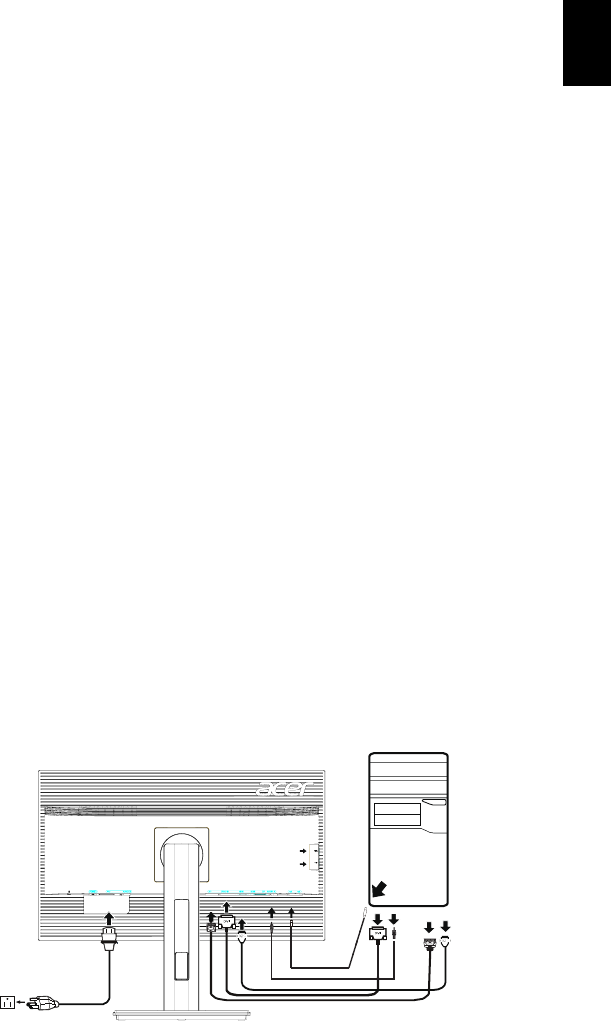
- Installation 21
- USER CONTROLS 22
- Using the Shortcut Menu 22
- Acer eColor Management 23
- Operation instructions 23
- Features and Benefits 23
- Adjusting the OSD settings 24
- Adjusting the OSD position 25
- DPmodeselection 26
- Product information 27
- Troubleshooting 28
Related products and manuals for TVs & monitors Acer B276HUL
 (28 pages)

 (25 pages)

 (118 pages)
(25 pages)
(27 pages)
(23 pages)
(7 pages)
(31 pages)
(23 pages)
(28 pages)
(33 pages)
(30 pages)
(28 pages)
(3 pages)
(118 pages)
(25 pages)
(27 pages)
(23 pages)
(7 pages)
(31 pages)
(23 pages)
(28 pages)
(33 pages)
(30 pages)
(28 pages)
(3 pages)
© 2020, manymanuals.com. All rights reserved. | 0.876 s |
 Manymanuals.com
 Manymanuals.de
 Manymanuals.fr
 Manymanuals.it
 Manymanuals.pl
 Manymanuals.cz
 Manymanuals.es
 Manymanuals-pt.com
Comments to this Manuals