Acer H5350 User's Guide Page 42
- Page / 53
- Table of contents
- BOOKMARKS
- Acer Projector 1
- H5350 Series 1
- User's Guide 1
- Caution for Accessibility 3
- Using electrical power 4
- Product servicing 5
- Additional safety information 5
- (Optional) 7
- Medical devices 7
- Vehicles 8
- Caution for Listening 8
- Disposal instructions 9
- Mercury advisory 9
- First thing first 10
- Contents 11
- Replacing the Lamp 28 12
- Ceiling Mount Installation 29 12
- Specifications 32 12
- Compatibility modes 34 12
- Introduction 13
- Package Overview 14
- Projector Overview 15
- # Icon Function Description 16
- Remote Control Placement 17
- Getting Started 18
- Turning the Projector On/Off 19
- Turning off the Projector 20
- Adjusting the Projected Image 21
- Max screen size 22
- 87" 22
- 50" 24
- User Controls 26
- Onscreen Display (OSD) Menus 27
- Color setting 28
- Image setting 29
- Management setting 31
- Audio setting 33
- Timer setting 33
- Language setting 34
- Appendices 35
- Problems with the Projector 37
- OSD Messages 38
- LED Messages 39
- Replacing the Lamp 40
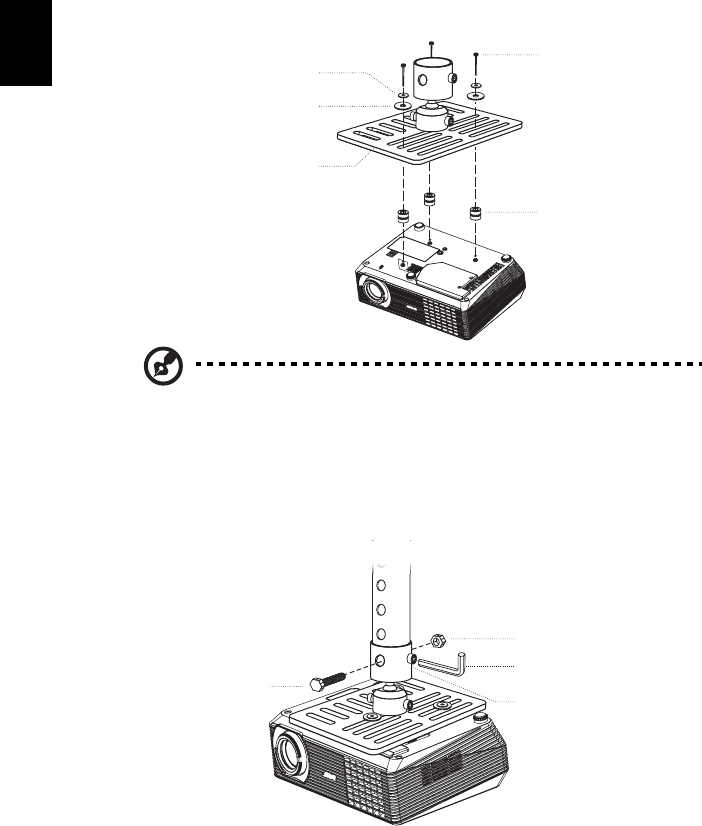
- Ceiling Mount Installation 41
- for adjustments 42
- - For heat dissipation 42
- 110,00 mm 43
- 82,30 mm 43
- SCREW SPEC. M3 x 20 mm 43
- Specifications 44
- Compatibility modes 46
- B. HDMI Digital 47
- 3 HDMI - Video Signal 48
- European Union (EU) 51
- List of applicable countries 51
- Declaration of Conformity 52
Related products and manuals for Projectors Acer H5350
 (60 pages)
 (43 pages)
(26 pages)
(27 pages)
(63 pages)
(26 pages)
(14 pages)
(27 pages)
(49 pages)
(54 pages)
(26 pages)
(54 pages)
(72 pages)
(5 pages)
(43 pages)
(26 pages)
(27 pages)
(63 pages)
(26 pages)
(14 pages)
(27 pages)
(49 pages)
(54 pages)
(26 pages)
(54 pages)
(72 pages)
(5 pages)
 (28 pages)
 (69 pages)
(57 pages)
(63 pages)
(69 pages)
(57 pages)
(63 pages)
© 2020, manymanuals.com. All rights reserved. | 0.637 s |
 Manymanuals.com
 Manymanuals.de
 Manymanuals.fr
 Manymanuals.it
 Manymanuals.pl
 Manymanuals.cz
 Manymanuals.es
 Manymanuals-pt.com
Comments to this Manuals